Learning how to reclaim and recycle clay is one of the most valuable skills any potter can develop. As someone who has been teaching ceramics for over a decade, I've found that proper clay recycling not only saves money but also reduces waste and can even improve your understanding of ceramic materials.
Clay Recycling at a Glance: Quick Reference
Clay State | Recycling Method | Time Required | Tools Needed |
|---|---|---|---|
Wet Scraps | Simple wedging | 10-30 minutes | Wedging board, canvas |
Leather-hard | Break & slake | 2-7 days | Buckets, screens, plaster |
Bone-dry | Slake & screen | 3-10 days | Buckets, screens, plaster |
Mixed Clays | Combined slaking | 3-10 days | Buckets, screens, plaster |
Clay Slurry | Drying & wedging | 1-5 days | Plaster bats, canvas |
How to Reclaim and Recycle Clay: A Complete Guide for Potters
When I first started teaching pottery, I noticed that many students would discard perfectly good clay after a minor mistake or at the end of a session. Learning how to reclaim and recycle clay changed their approach completely. The process of recycling clay isn't just economically smart—it's an essential practice for any serious potter looking to run a sustainable studio. "But isn't reclaimed clay inferior to fresh clay?" This is perhaps the most common misconception I hear from beginners. The truth is that properly reclaimed clay is often just as good as fresh clay, and in some cases, it can even be better. The aging process that occurs during recycling can improve plasticity and workability, giving you a superior material for your next project.
According to a survey by the National Council on Education for the Ceramic Arts, studios that implement systematic clay recycling can reduce their clay costs by up to 30-40%. For a busy studio, this can translate to hundreds or even thousands of dollars in savings annually. Beyond the financial benefits, there's also the significant environmental impact—recycling clay reduces resource consumption and keeps material out of landfills. In this comprehensive guide, I'll walk you through everything you need to know about how to recycle pottery clay, from the essential tools to step-by-step processes for different clay states. Whether you're a beginner looking to save money or a professional aiming to run a more sustainable studio, these techniques will help you make the most of every scrap of clay.
Why Recycle Clay? Environmental and Economic Benefits
Before diving into the specifics of how to reclaim clay, it's worth understanding why this practice is so valuable for potters of all levels.
The Environmental Impact
Clay conservation isn't just a personal choice—it's an environmental imperative for ceramic artists. The mining and processing of virgin clay consumes significant resources and energy. Commercial clay production involves extraction, transportation, and processing, all of which leave an environmental footprint. By recycling clay, we reduce demand for new raw materials and minimize waste. A typical pottery studio can generate 200-500 pounds of clay waste annually if no recycling is practiced—material that would otherwise end up in landfills. As ceramic artists, we have a responsibility to practice pottery waste management and minimize our environmental impact whenever possible. Recycling clay is one of the most direct ways we can contribute to sustainability in our craft.
Economic Advantages
Beyond the environmental benefits, there are compelling financial reasons to learn how to recycle clay. The average price of commercial clay ranges from $20-40 per 25-pound bag, depending on the type and quality. By reclaiming your clay scraps, you can recover 80-90% of this material, representing significant savings over time. For teaching studios, clay recycling can reduce material costs by thousands of dollars annually. Even for individual potters, the savings add up quickly—reclaiming just one pound of clay per week saves approximately $30-80 per year, depending on the clay type. I've worked with several community studios that have funded additional equipment or scholarships entirely through the money saved by implementing effective clay recycling systems. The economic case for recycling is simply undeniable, especially as clay prices continue to rise due to increasing energy and transportation costs.
Improved Clay Properties
There's another benefit to clay reclamation that's less often discussed—the potential for improved working properties. During the recycling process, clay often "ages," allowing the water molecules to more thoroughly penetrate the clay particles. This aging can improve plasticity and workability. Recycled clay that has gone through the slaking process often has a more even moisture distribution than fresh clay. Some potters intentionally mix recycled clay with fresh clay to achieve optimal working properties. In my own practice, I've found that a blend of about 50% fresh clay with 50% recycled clay often provides the best working experience, combining the reliability of fresh material with the enhanced plasticity of recycled clay.
Essential Tools and Materials for Effective Clay Recycling
Setting up for clay recycling doesn't require expensive equipment, but having the right tools makes the process much more efficient.
Basic Tools for Clay Reclamation
To get started with recycling clay, you'll need large plastic buckets with lids which are essential for slaking clay and storing slurry. Look for food-grade 5-gallon buckets, which are usually available inexpensively from bakeries or restaurants. Screens of various mesh sizes help remove impurities and break down clumps. Window screen (approximately 20 mesh) works well for basic screening, while finer mesh (60-80) can be used for more refined clay bodies. A sturdy drill with a paint mixer attachment can speed up the slaking process dramatically, though it's not strictly necessary. Plaster bats or boards are invaluable for drawing moisture from clay slurry. If you don't have commercial plaster bats, you can make your own using plaster of Paris and simple molds. Approximately 80% of the most useful clay reclamation tools can be acquired for under $100 total, making this an accessible practice even for beginners with limited budgets.
Setting Up Your Recycling Station
Creating a dedicated space for clay recycling improves efficiency and organization. Designate a specific area for recycling, ideally with water access and good drainage. Include shelving or table space for buckets of clay in various stages of processing. Consider waterproof flooring or mats, as the process can be messy. Ensure adequate ventilation, especially if you're recycling large amounts of clay that might create dust during the dry stages. In my studio, I've set up a recycling corner with stackable plastic shelving for buckets, a utility sink, and a dedicated table for plaster bats. This organization makes it easy to maintain multiple batches of clay in different stages of the recycling process without creating chaos in the workspace.
Optional Advanced Equipment
For larger studios or production potters, additional tools can streamline the clay recycling process. A pugmill can dramatically speed up the mixing and homogenizing of recycled clay, though good models start at around $2,000. Vacuum de-airing equipment removes air bubbles from recycled clay, producing a higher quality result. Large-scale drying cabinets or beds can process bigger batches of clay slurry more efficiently. While these tools can be wonderful if you have access to them, remember that potters have been successfully recycling clay for thousands of years without modern equipment. The basic process remains effective even with minimal tools.
The Clay Reclamation Process: Step-by-Step Instructions
The specific approach to reclaiming clay varies depending on the state of your clay scraps, but the general process follows similar principles.
Assessing Your Clay Scraps
Before beginning the clay recycling process, evaluate what you're working with. Determine the state of your clay—is it still moist, leather-hard, or bone dry? This will affect how you approach recycling. Identify the clay type and keep different clay bodies separate unless you intentionally want to blend them. Check for contamination like tools, sponge pieces, or non-clay materials that must be removed. Estimate the quantity to determine the appropriate container size and approach. This assessment helps you choose the right method for reconstituting dry clay or processing moist scraps. For small amounts of relatively fresh clay, simple wedging might be sufficient, while larger quantities or drier material will require the full slaking process.
General Recycling Process Overview
For most situations, here's the standard approach to recycling pottery clay. Collect and sort your clay scraps by type, keeping different clay bodies separate. Break dry or leather-hard clay into small pieces to speed up the slaking process. Place the clay pieces in a bucket and add clean water until they're completely covered. Allow the clay to slake (break down into slip) for 24-48 hours, stirring occasionally if possible. Screen the resulting slurry to remove impurities and break up remaining clumps. Transfer the screened slurry to plaster bats or bags to remove excess moisture. Once the clay reaches a workable consistency, wedge thoroughly to ensure even moisture distribution and remove air bubbles. This basic clay reclamation process can be adjusted for different clay types and conditions, but the fundamental steps remain consistent. For very small amounts of still-moist clay, you might be able to skip directly to the wedging stage, but for larger amounts or drier clay, the full process yields better results.
Slaking and Screening: Converting Dry Clay and Scraps to Slurry
The slaking process is the heart of recycling clay when working with dry or leather-hard materials.
Effective Slaking Techniques
To optimize the clay slaking process, break dry clay into pieces no larger than a golf ball—smaller pieces slake faster and more evenly. Use warm (not hot) water to speed up the process; cold water works but takes longer. Add a small amount of vinegar (about 1 tablespoon per gallon) to help break down the clay faster. Stir the mixture periodically to ensure all clay pieces are exposed to water. Allow sufficient time—usually 24-48 hours for leather-hard clay and up to 72 hours for bone-dry material. I've found that covering the slaking bucket with a lid helps maintain moisture and prevents contamination, while also reducing evaporation if the process takes several days. Some potters add a small amount of sodium silicate (approximately 1 teaspoon per 5 gallons) to help deflocculate the clay and create a smoother slurry, though this is optional.
Screening Methods for Clay Slurry
Once your clay has broken down into slurry, screening reclaimed clay removes impurities. Stir the slurry thoroughly to ensure even consistency before screening. Pour the slurry through a coarse screen (window screen mesh) first to remove larger impurities. For finer clay bodies, follow with a finer mesh screen (60-80 mesh). Collect the screened slurry in clean buckets. Use a rubber rib or spatula to help push the slurry through the screen if it's thick. The consistency of your slurry should be similar to heavy cream or thin yogurt. If it's too thick, add small amounts of water and mix thoroughly. If it's too thin, you'll need to remove more water during the drying stage, which takes longer but doesn't affect the final quality.
Dealing with Contamination
One of the challenges in clay recycling is managing contamination. Visually inspect clay scraps before slaking and remove any obvious non-clay materials. Be particularly careful about sponge pieces, tools, or organic material. If working with glazed or bisque-fired pieces, these cannot be recycled through normal slaking—they require crushing and special processing that's usually not practical for home studios. For clay with minor contamination from plaster or other materials, multiple screenings through progressively finer mesh can help remove unwanted particles. Small amounts of cross-contamination between similar clay bodies is usually not problematic, but mixing clay types with significantly different shrinkage rates or firing temperatures can lead to cracking or warping in the finished work.
From Slurry to Studio: Drying Reclaimed Clay to Working Consistency
Once you've created and screened your clay slurry, the next challenge is bringing it back to a workable consistency.
Using Plaster to Draw Moisture
Plaster is the potter's best friend for drying reclaimed clay. Pour your screened slurry onto plaster bats or boards to a depth of 1-2 inches. The plaster absorbs water from the clay, gradually bringing it to a workable consistency. Depending on the initial slurry consistency, climate, and plaster condition, this process typically takes 1-5 days. As the edges begin to firm up, fold them toward the center to promote even drying. When the clay reaches a soft but moldable consistency, remove it from the plaster to prevent it from becoming too dry. I recommend having multiple plaster bats in rotation so you can process larger batches of clay continuously. The plaster can be rejuvenated by allowing it to dry completely between uses. In humid climates, you may need to use fans or dehumidifiers to speed up the drying process.
Alternative Drying Methods
If you don't have access to plaster, there are other approaches to clay slurry processing. Canvas bags designed for clay can be filled with slurry and hung to allow water to drain out. This method is slower than plaster but effective. Shallow plastic trays can be used to allow evaporation, though this is much slower and less controllable than plaster. For small amounts, you can pour slurry onto absorbent materials like thick cotton towels or several layers of newspaper. While these alternatives work, plaster remains the most efficient method for drying clay slurry to an ideal consistency. A single 2'x2' plaster bat costs about $20-30 to make yourself and will last for years with proper care, making it a worthwhile investment for anyone serious about clay recycling.
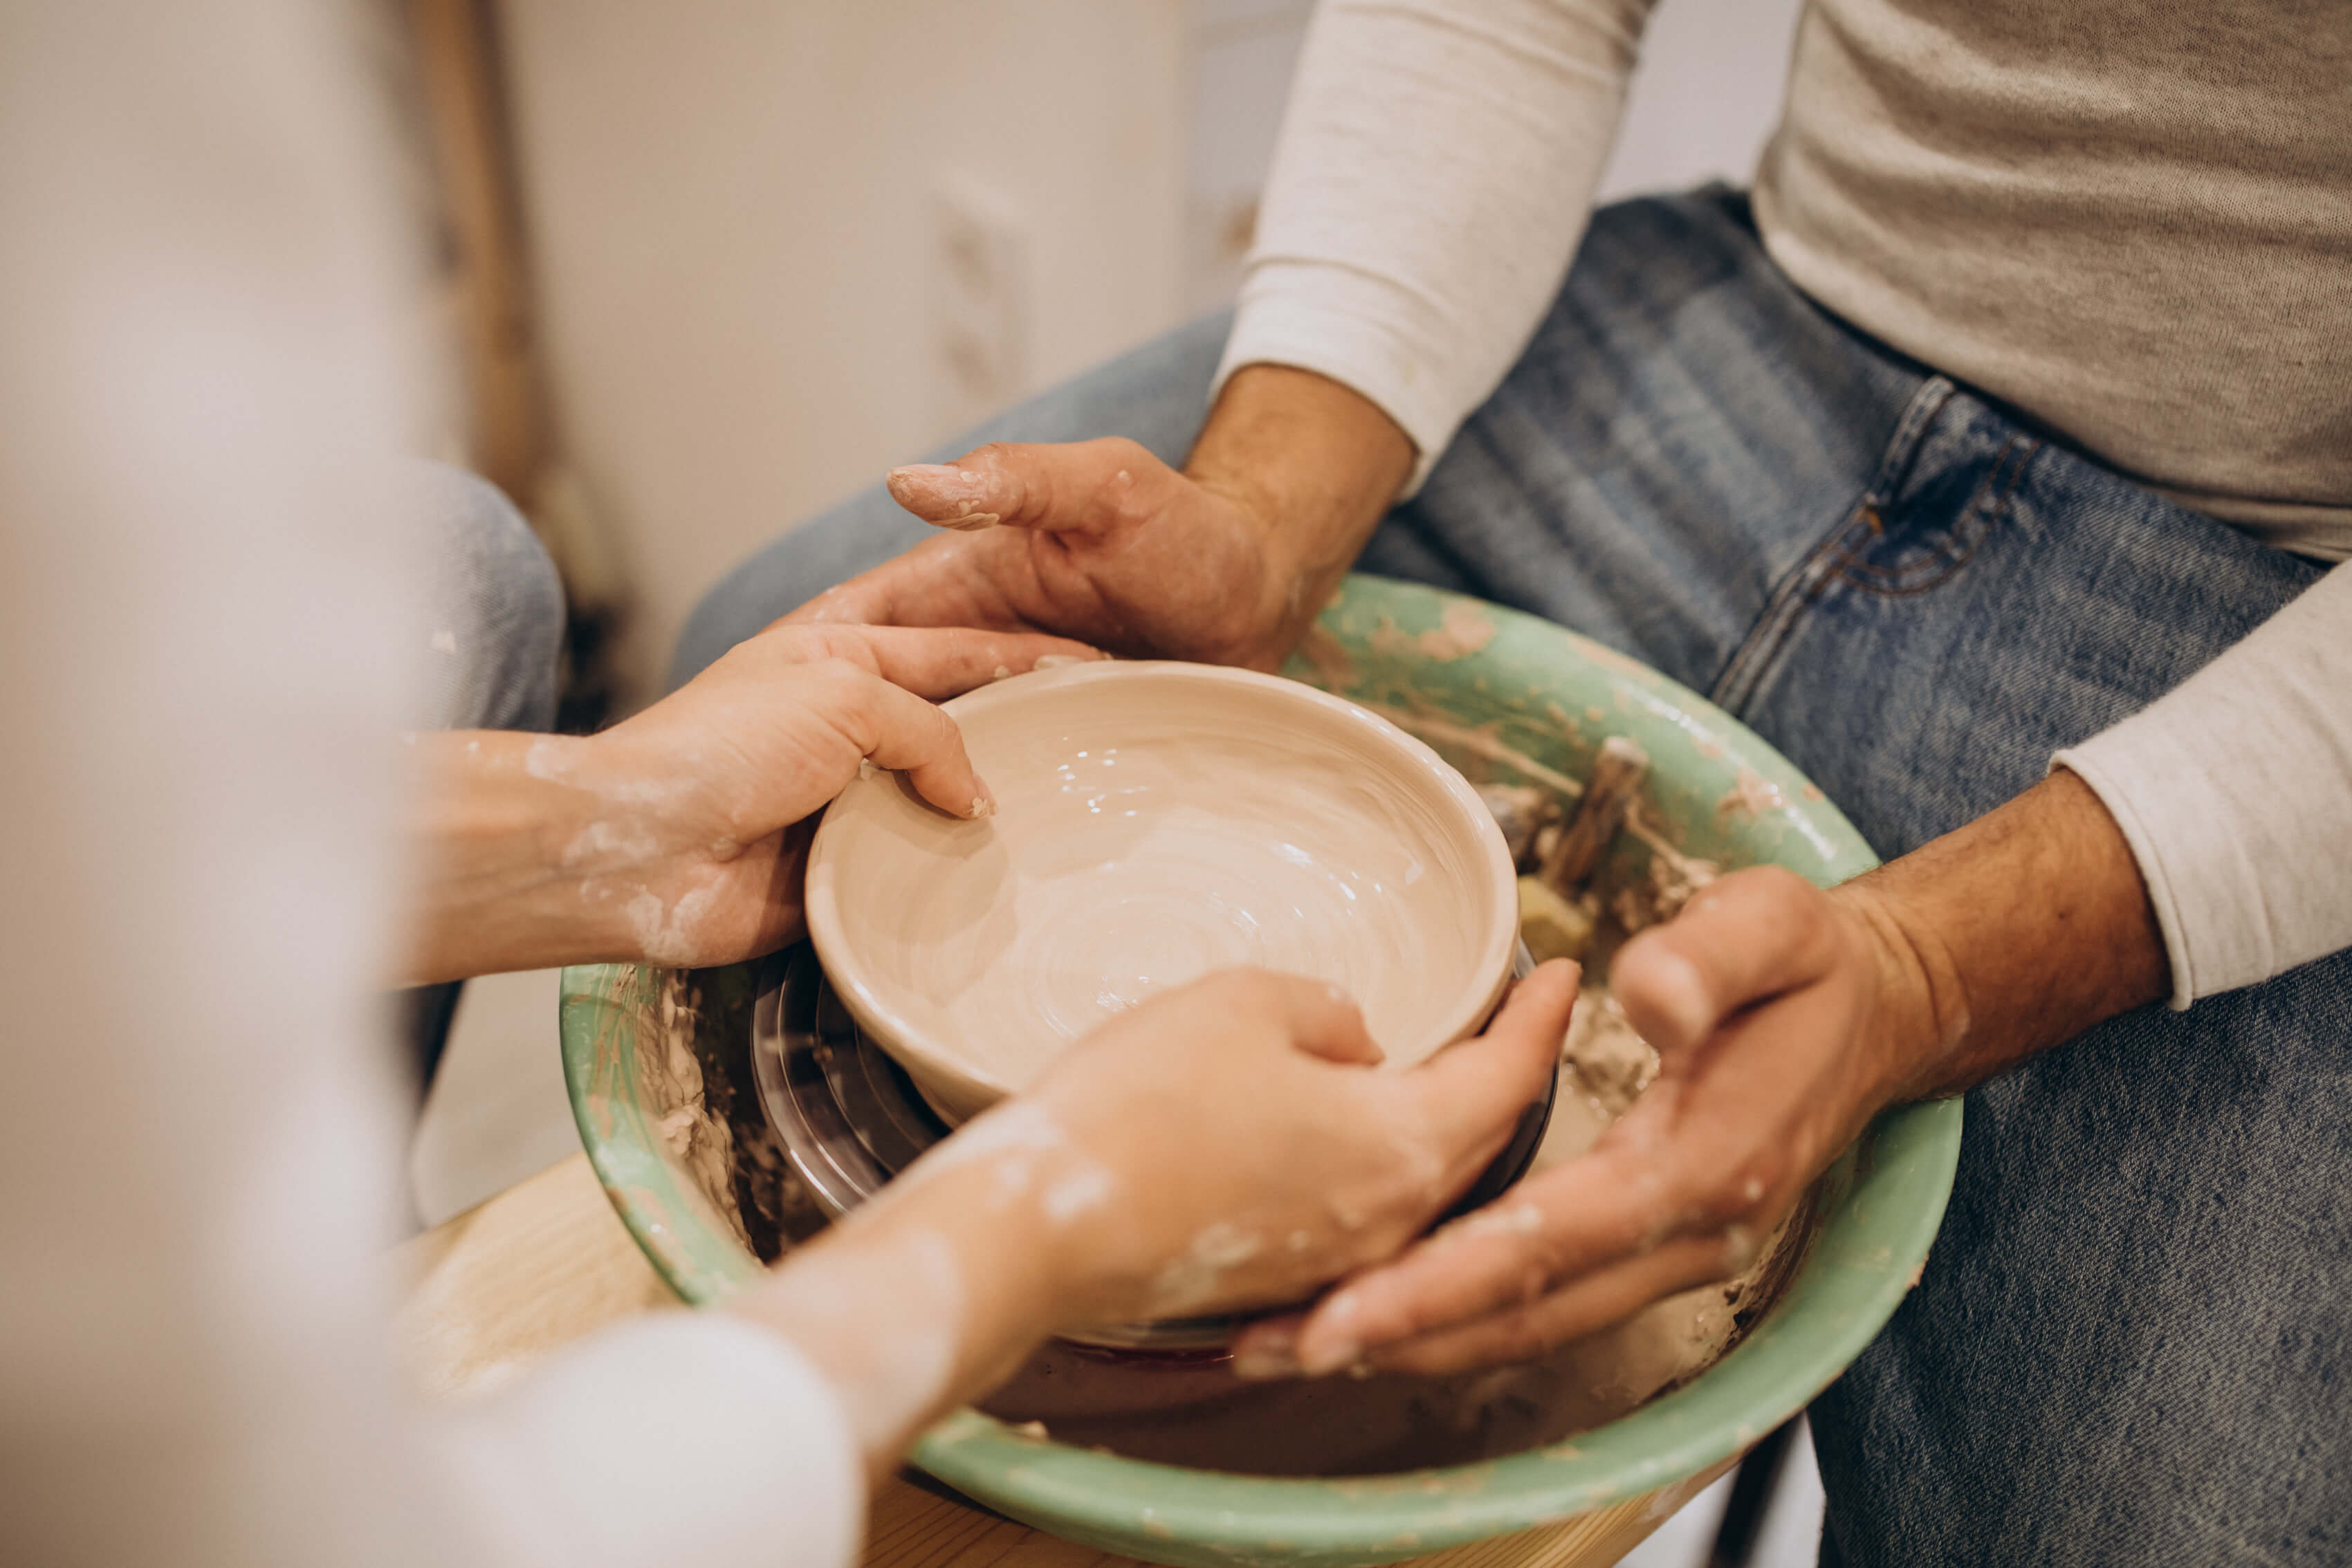
Monitoring Clay Consistency
Knowing when your reclaimed clay has reached the right consistency is crucial. The ideal consistency for most purposes is when the clay can be easily formed into a ball without sticking excessively to your hands, but remains soft enough to manipulate. Use the "thumb test"—press your thumb into the clay; it should make an impression without the clay sticking to your thumb. If using a moisture meter, aim for about 20-23% moisture content for most pottery clays. Remember that it's easier to dry clay a bit more if needed than to add moisture back to clay that's too dry. With experience, you'll develop an intuitive sense for when clay has reached the perfect working consistency. When in doubt, err on the slightly wetter side, as you can always remove more moisture during the wedging process.
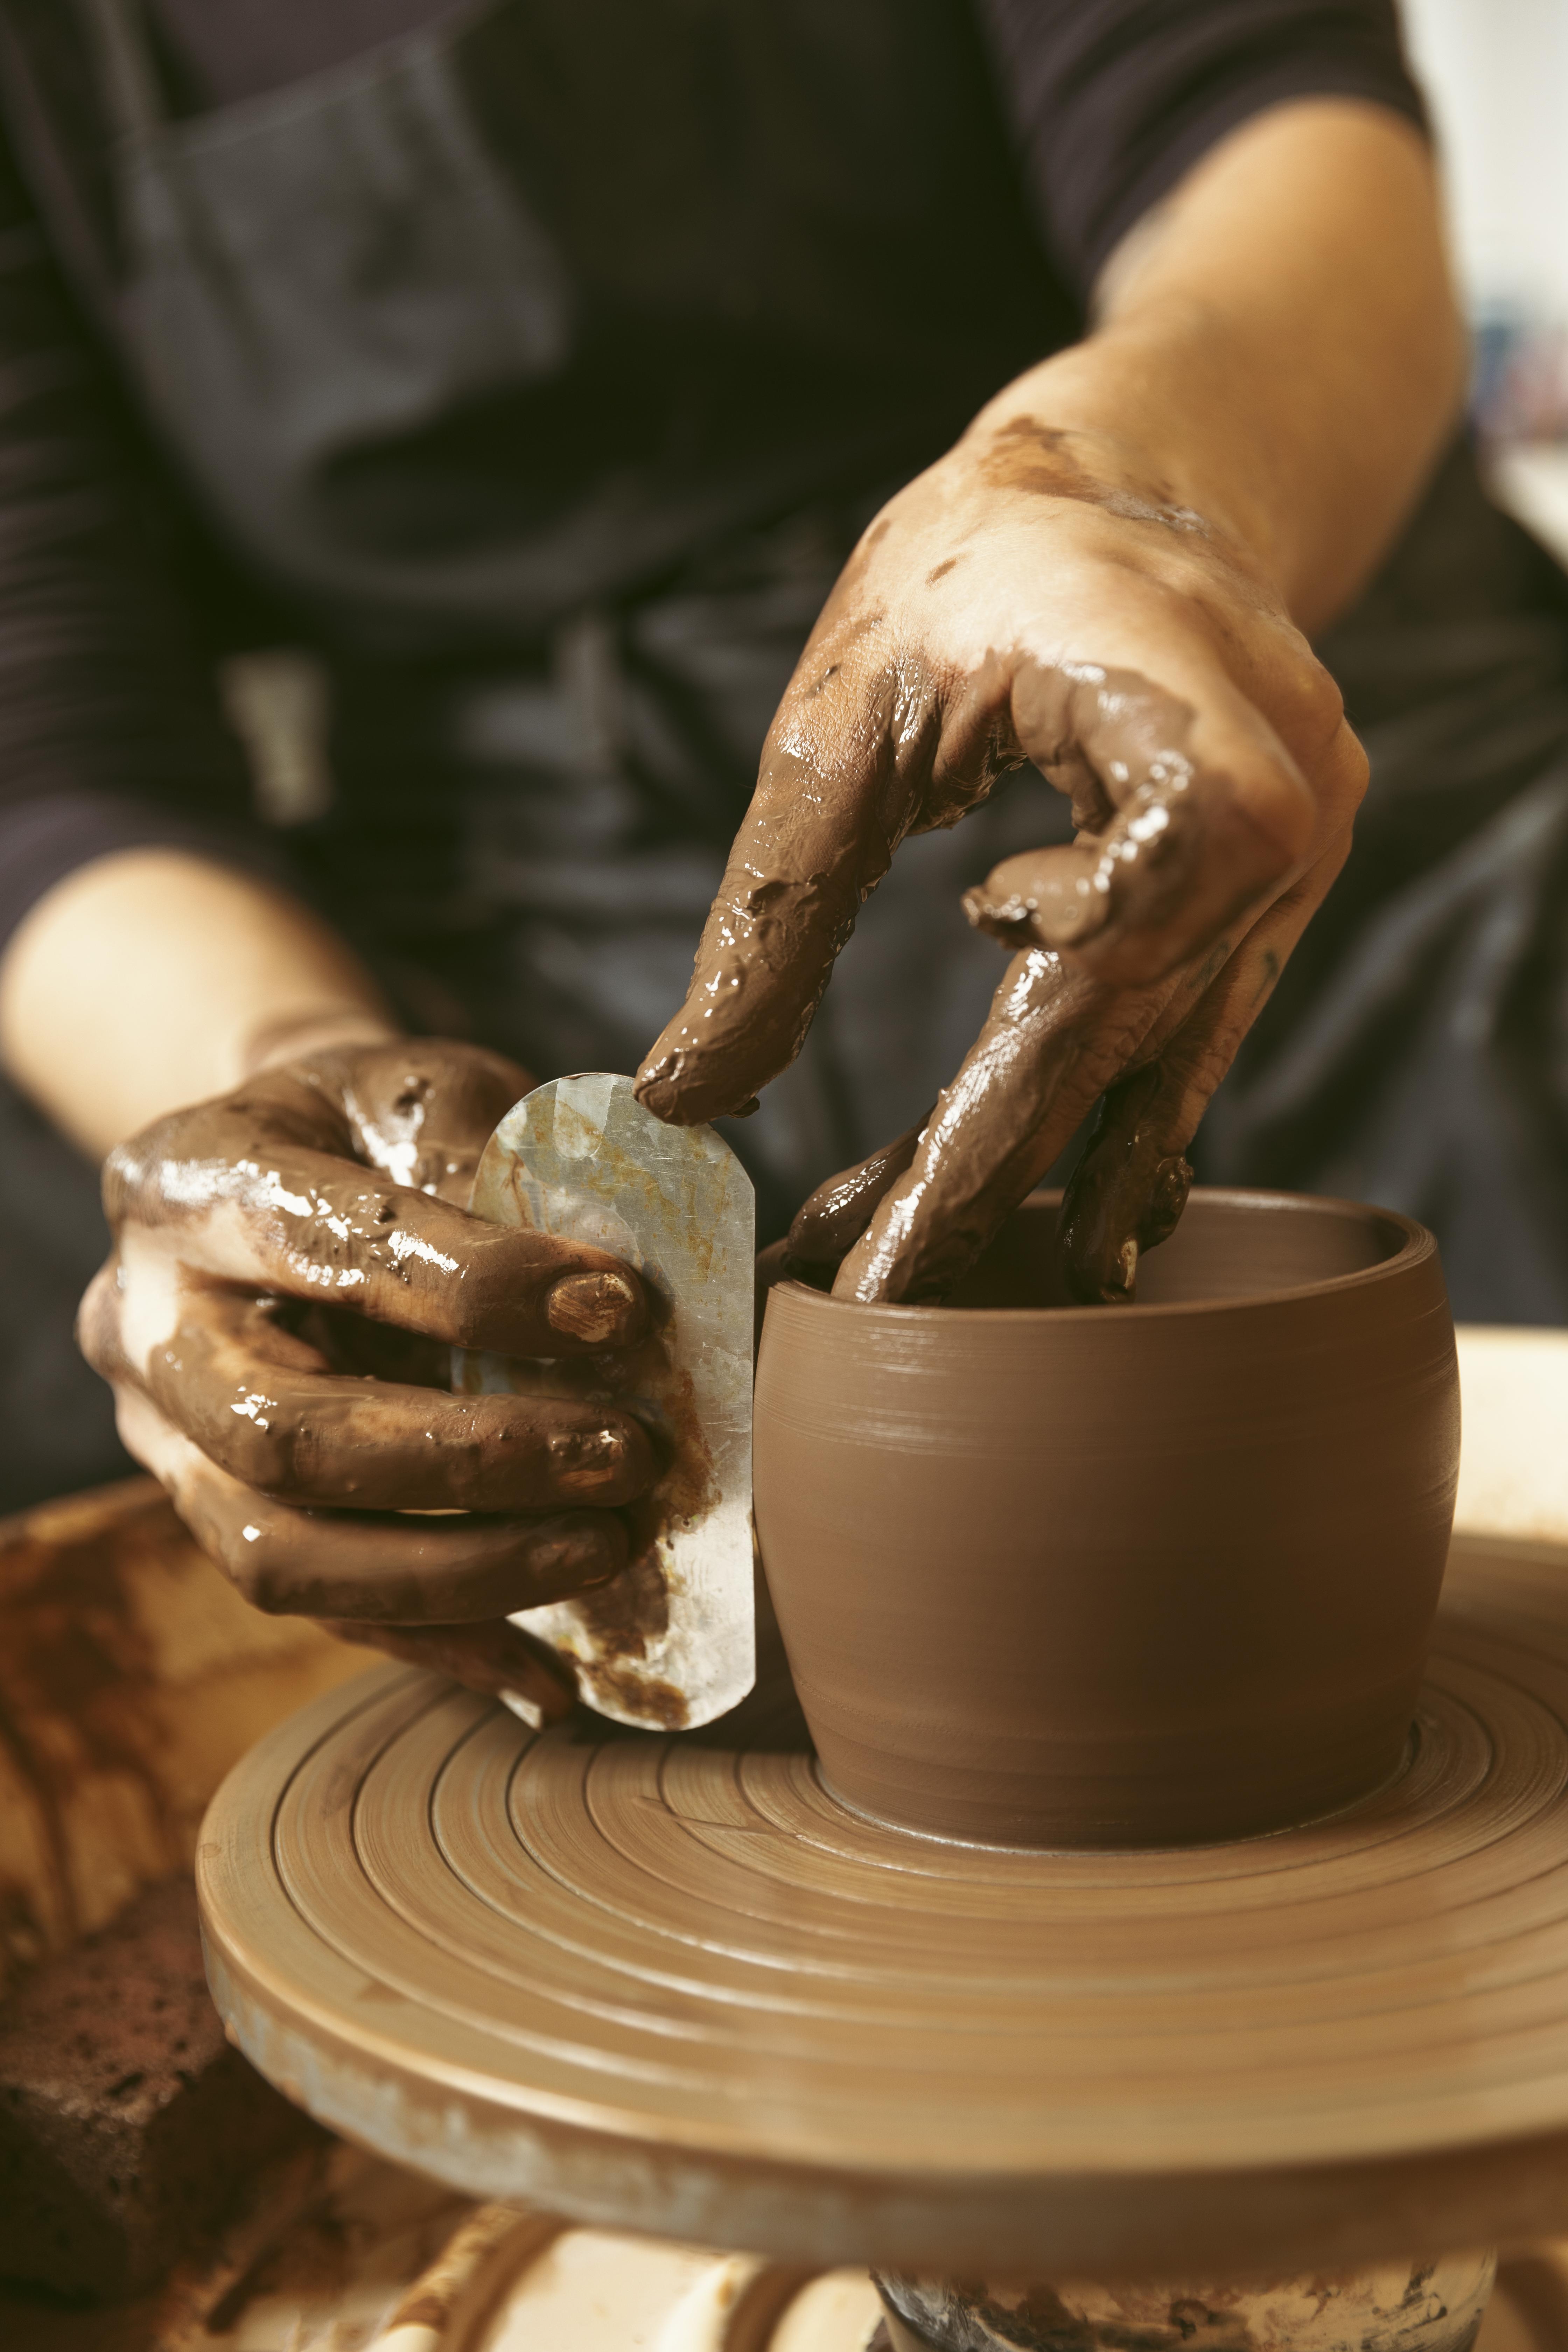
Wedging and Preparing Your Recycled Clay for Use
Proper wedging is the final crucial step in recycling clay before returning it to service in your studio.
Effective Wedging Techniques
Clay wedging techniques for recycled clay require attention to detail. Use the appropriate wedging method for your clay type—ram's head wedging works well for most recycled stoneware and earthenware, while spiral wedging may be better for porcelain and finer clay bodies. Aim for at least 50-100 wedging movements to ensure thorough mixing and air removal. Pay special attention to removing air pockets, which can be more common in recycled clay than in fresh clay. Test a small piece by cutting it with a wire to check for air bubbles or inconsistencies. If the clay feels too wet after wedging, allow it to dry on plaster or canvas for a short time, then wedge again. If it feels too dry, you can wrap it in wet cloths or plastic overnight, then rewedge once the moisture has equilibrated.
Testing Reclaimed Clay
Before using recycled clay for important projects, it's wise to test its properties. Create small test pieces to evaluate the clay's performance. Check for workability, plasticity, and responsiveness to your forming methods. Fire test pieces to ensure the recycled clay responds as expected during firing. Document your recycling process and results to refine your method over time. I recommend labeling your reclaimed clay with the clay type and recycling date. This documentation helps track how the clay performs and how long it takes for recycled clay to reach optimal working properties through aging.
Storing Recycled Clay
Proper storage maintains the quality of your reclaimed clay. Store in airtight containers or wrap tightly in plastic to prevent drying. Label clearly with clay type and date of recycling. For long-term storage, check periodically for mold (particularly in warm, humid environments) and rewedge if necessary. Some potters add a few drops of bleach or vinegar to clay water when recycling to prevent mold growth during storage. Well-maintained recycled clay can be stored for months or even years if properly sealed. In fact, many potters find that clay improves with age as the water molecules more thoroughly hydrate the clay particles, enhancing plasticity and workability.
Setting Up an Efficient Clay Recycling System for Your Studio
Creating a systematic approach to clay recycling makes the process more efficient and increases the likelihood that you'll maintain the practice.
Organizing Your Recycling Workflow
An effective clay recycling system includes designated collection containers for different types of clay scraps, clear labeling of all buckets, containers, and storage areas, a dedicated area for the recycling process that doesn't interfere with your main work space, and a schedule for processing recycled clay to prevent backlog (particularly important for teaching studios). In my teaching studio, we use color-coded buckets—blue for porcelain scraps, red for terracotta and earthenware, and gray for stoneware. This simple system prevents cross-contamination and makes the recycling process more straightforward for students and staff.
Scaling Your System Appropriately
Your clay reclamation setup should match your production volume. Solo potters might need just a few buckets and one or two plaster bats. Small studios with 2-5 potters should consider a dedicated recycling area with multiple processing batches. Larger teaching facilities benefit from formal recycling stations and potentially mechanical assistance like pugmills. According to a survey of communal studios, facilities that implement organized clay recycling systems recover an average of 65-80% of their clay, compared to just 30-40% in studios with ad hoc approaches. The systematic approach not only increases yield but also improves the quality of the reclaimed clay.
Integrating Recycling into Daily Practice
Making clay recycling a routine studio practice ensures success. Establish regular times for processing recycled clay—weekly or monthly depending on your production volume. Train all studio users in proper collection and sorting procedures. Make recycling containers at least as accessible as trash bins to encourage proper disposal. Consider designating someone as the "recycling coordinator" in shared studios. Studios that integrate recycling into their routine operations not only save money but also tend to develop a stronger community ethos around resource conservation and sustainability. The practice becomes part of the studio culture rather than an occasional afterthought.
How to Reclaim and Recycle Clay: Final Thoughts
Learning how to reclaim and recycle clay is more than just a cost-saving measure—it's a fundamental skill that connects us to the long tradition of pottery as a sustainable craft. Throughout history, potters have been resourceful with materials, finding ways to reuse, repurpose, and maximize every scrap of clay. As you develop your own clay recycling practice, remember that the process gets easier and more efficient with experience. What might initially seem like a time-consuming chore soon becomes an intuitive part of your studio routine, offering both practical benefits and a deeper connection to your materials.
I encourage potters at all levels to embrace clay reclamation as an essential component of their practice. The environmental and economic benefits are significant, but equally important is the knowledge and material understanding you gain from the process. There's something profoundly satisfying about transforming what might have been waste into beautiful new creations—a perfect embodiment of the creative cycle that makes ceramics such a rewarding art form. By mastering how to reclaim and recycle clay, you join a global community of potters committed to mindful material usage and sustainable studio practices. Your art becomes not just an expression of creativity, but also of responsibility and resourcefulness.
FAQs About Reclaiming and Recycling Clay
How much money can I save by recycling clay?
The savings from clay recycling depend on your production volume, but most potters can reclaim 70-90% of their clay scraps with proper techniques. For a hobbyist using 100 pounds of clay per month, recycling could save $300-600 annually. For teaching studios or production potters, the savings can easily reach thousands of dollars per year. Beyond the direct cost savings, you'll also reduce waste disposal expenses and environmental impact.
Can I mix different types of clay when recycling?
While it's best to recycle clay types separately, you can intentionally blend compatible clays. The key consideration is firing temperature—only mix clays with similar maturing temperatures (within one cone). Porcelain can be mixed with white stoneware, and different stoneware bodies can often be combined. However, mixing high-fire and low-fire clays will result in unpredictable firing behavior. Always test blended clay before using it for important work, as the shrinkage rate, workability, and fired color may be affected.
How do I recycle clay without a pugmill?
While pugmills make clay recycling faster and easier, they're not necessary. The traditional slaking method works perfectly well: break dry clay into small pieces, cover with water until fully slaked, screen the resulting slurry, dry on plaster bats to working consistency, and wedge thoroughly by hand. This manual process takes longer but requires minimal equipment and produces excellent results. Many professional potters successfully recycle all their clay without mechanical assistance.
Can bisque-fired or glazed clay be recycled?
Once clay has been fired, either to bisque or glaze temperatures, it cannot be recycled through normal slaking methods since the ceramic change is irreversible. However, fired ceramics can be crushed to create grog (an additive that provides texture and reduces shrinkage in clay bodies) or ground extremely fine for use in glazes. These processes typically require special equipment and are generally more practical for industrial settings than home studios.
How do I know if my recycled clay is ready to use?
Properly recycled clay should have consistent moisture throughout, no visible air pockets when cut with a wire, and appropriate plasticity for your intended forming method. Test by rolling a coil and bending it into a U-shape—it should bend without cracking. For throwing clay, roll a ball and try centering a small amount. The clay should respond similarly to fresh clay of the same type. If you're uncertain, make a small test piece before committing to larger projects.


Stay up-to-date