Key Insights About Wheel-Throwing
Aspect | Details |
|---|---|
Definition | The process of forming clay on a rotating wheel using hands and tools |
Origin | Ancient technique dating back to 3500 BCE in Mesopotamia |
Primary Steps | Centering, opening, pulling walls, shaping, finishingKey Equipment |
Key Equipment | Potter's wheel (electric or kick), clay, basic tools (wire cutter, ribs, needle tool) |
Best Clay Types | Medium to soft stoneware, porcelain for advanced throwers |
Learning Curve | 4-6 weeks for basic forms, years for mastery |
Beginner Projects | Cylinders, small bowls, simple mugs |
Compared to Hand-Building | More efficient for round forms, requires more specialized equipment |
Understanding what is wheel-throwing in pottery has been my journey for over a decade, from struggling to center my first lump of clay to creating complex forms on the wheel. If you've ever watched a potter transform a humble ball of clay into a beautiful vessel while spinning on a wheel, you've witnessed the mesmerizing art of wheel-thrown pottery. This ancient technique might look like magic, but it's actually a learnable skill that combines practice, patience, and understanding of clay's properties.
Many beginners ask me: "Is wheel-throwing difficult to learn?" or "Can I learn pottery wheel techniques at home?" In this comprehensive guide, I'll answer these questions and many more as we explore what wheel-throwing in pottery is all about, from its ancient origins to the fundamental techniques you'll need to get started on your own pottery journey.
Definition and History of Wheel-Throwing in Pottery
Wheel-throwing in pottery is a forming technique where a potter shapes clay on a rotating platform called a potter's wheel. The rotation creates centrifugal force that helps the potter shape the clay symmetrically using their hands and simple tools. Unlike hand-building methods, wheel throwing pottery relies on the wheel's constant motion to create primarily cylindrical or round forms.
The Ancient Origins of the Potter's Wheel
The history of wheel-throwing ceramics stretches back approximately 5,500 years. Archaeological evidence suggests that the first potter's wheel was developed in Mesopotamia (modern-day Iraq) around 3500 BCE, revolutionizing pottery production. Before this innovation, all pottery was hand-built using techniques like coiling and pinching.
The term "throwing" itself has interesting origins. It doesn't refer to tossing clay onto the wheel (though that is how we start), but comes from the Old English word "thrawan," which means "to twist or turn." This etymology perfectly captures the essence of the process – the turning of the wheel that enables the formation of the pot.
The earliest potter's wheels were simple turntables rotated by hand or with a stick. Around 2000 BCE, the kick wheel emerged, featuring a heavy flywheel at the bottom that the potter would kick to maintain rotation. This freed both hands for shaping the clay – a significant advancement.
Today's electric wheels would amaze ancient potters. Most professional potters now use electric wheels, though traditional kick wheels are still favored by some for their direct connection to the process and the ability to work without electricity.
How the Potter's Wheel Works: Mechanics and Types
Understanding what is wheel-throwing in pottery requires familiarity with the tool at its center: the potter's wheel. The mechanics are surprisingly simple – a flat disc (the wheelhead) rotates on a shaft connected to a power source, whether human energy or electricity.
Modern pottery wheel throwing typically happens on one of two types of wheels: electric wheels or kick wheels. Electric wheels feature a motor that turns the wheelhead at variable speeds controlled by a foot pedal. These wheels are popular for beginners because they're easier to use and maintain consistent speed. Electric wheels typically rotate counterclockwise (though many can reverse direction), and speeds range from 0 to about 240 RPM.
Kick wheels (or treadle wheels) are powered by the potter's foot pushing a lower flywheel. The heavy flywheel's momentum keeps the wheelhead spinning. These traditional wheels require more physical effort but offer precise speed control and don't need electricity. Many traditional potters appreciate the meditative rhythm of working on a kick wheel.
The science behind wheel-throwing techniques involves centrifugal force – as the wheel spins, this force pushes the clay outward. The potter's hands provide counter-pressure that, when balanced correctly, allows for controlled shaping of the clay.
Water acts as both lubricant and binding agent during throwing. It reduces friction between hands and clay while helping clay particles adhere to each other in their new arrangement. This balance between moisture content, wheel speed, and hand pressure is what makes wheel-throwing pottery both challenging and satisfying.
The Fundamental Steps of Wheel-Throwing Pottery
The process of wheel-throwing ceramics follows a sequence of steps that potters have refined over thousands of years. While individual techniques may vary, these fundamental stages remain consistent regardless of what form you're creating.
Before any wheel throwing begins, the clay must be properly prepared through wedging – a kneading process that removes air bubbles and ensures even moisture distribution. Properly wedged clay is homogeneous and will behave predictably on the wheel. For beginners, I recommend starting with a ball of medium-soft clay weighing between 1-2 pounds (about the size of a large orange). Larger amounts are harder to center for newcomers to wheel-throwing pottery.
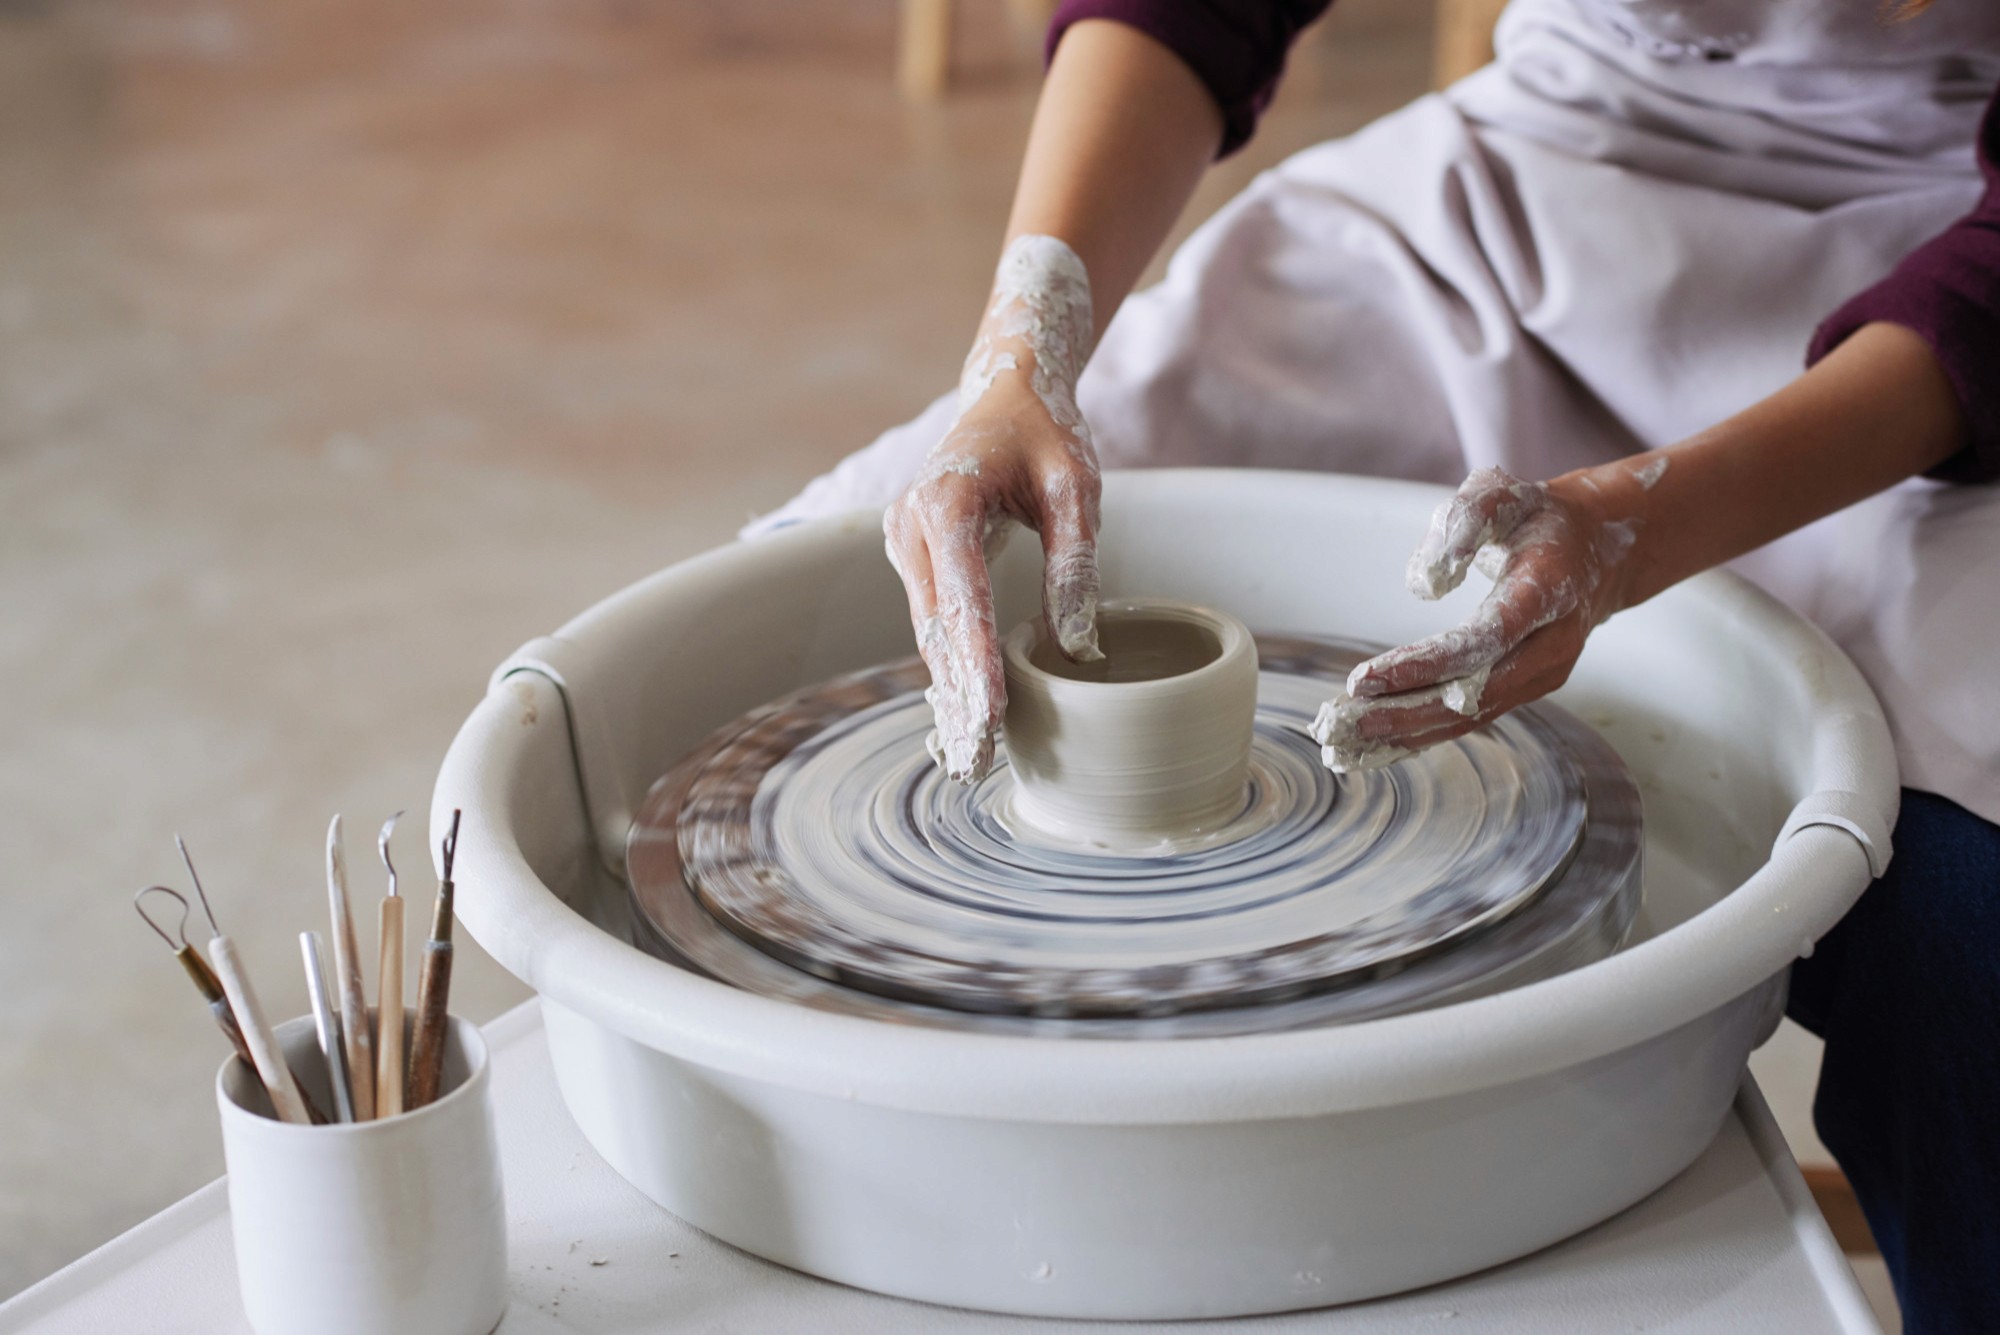
Centering is perhaps the most crucial skill in learning what is wheel-throwing in pottery. This process involves placing the clay ball in the middle of the wheelhead and using pressure to align all clay particles with the central axis of rotation. When clay is perfectly centered, it appears to be motionless as the wheel spins.
Once centered, the potter creates an opening in the clay by pressing down with thumbs or fingers. This depression will eventually become the inside of the vessel. The next step – pulling – involves drawing the clay upward and outward to create the walls of the vessel.
During pulling, potters carefully pinch the clay between their inside and outside hands, gradually thinning and raising the walls. This might be repeated several times to achieve the desired height and thickness. In wheel throwing pottery, wall thickness typically ranges between 1/4 to 3/8 inch, depending on the size and purpose of the piece.
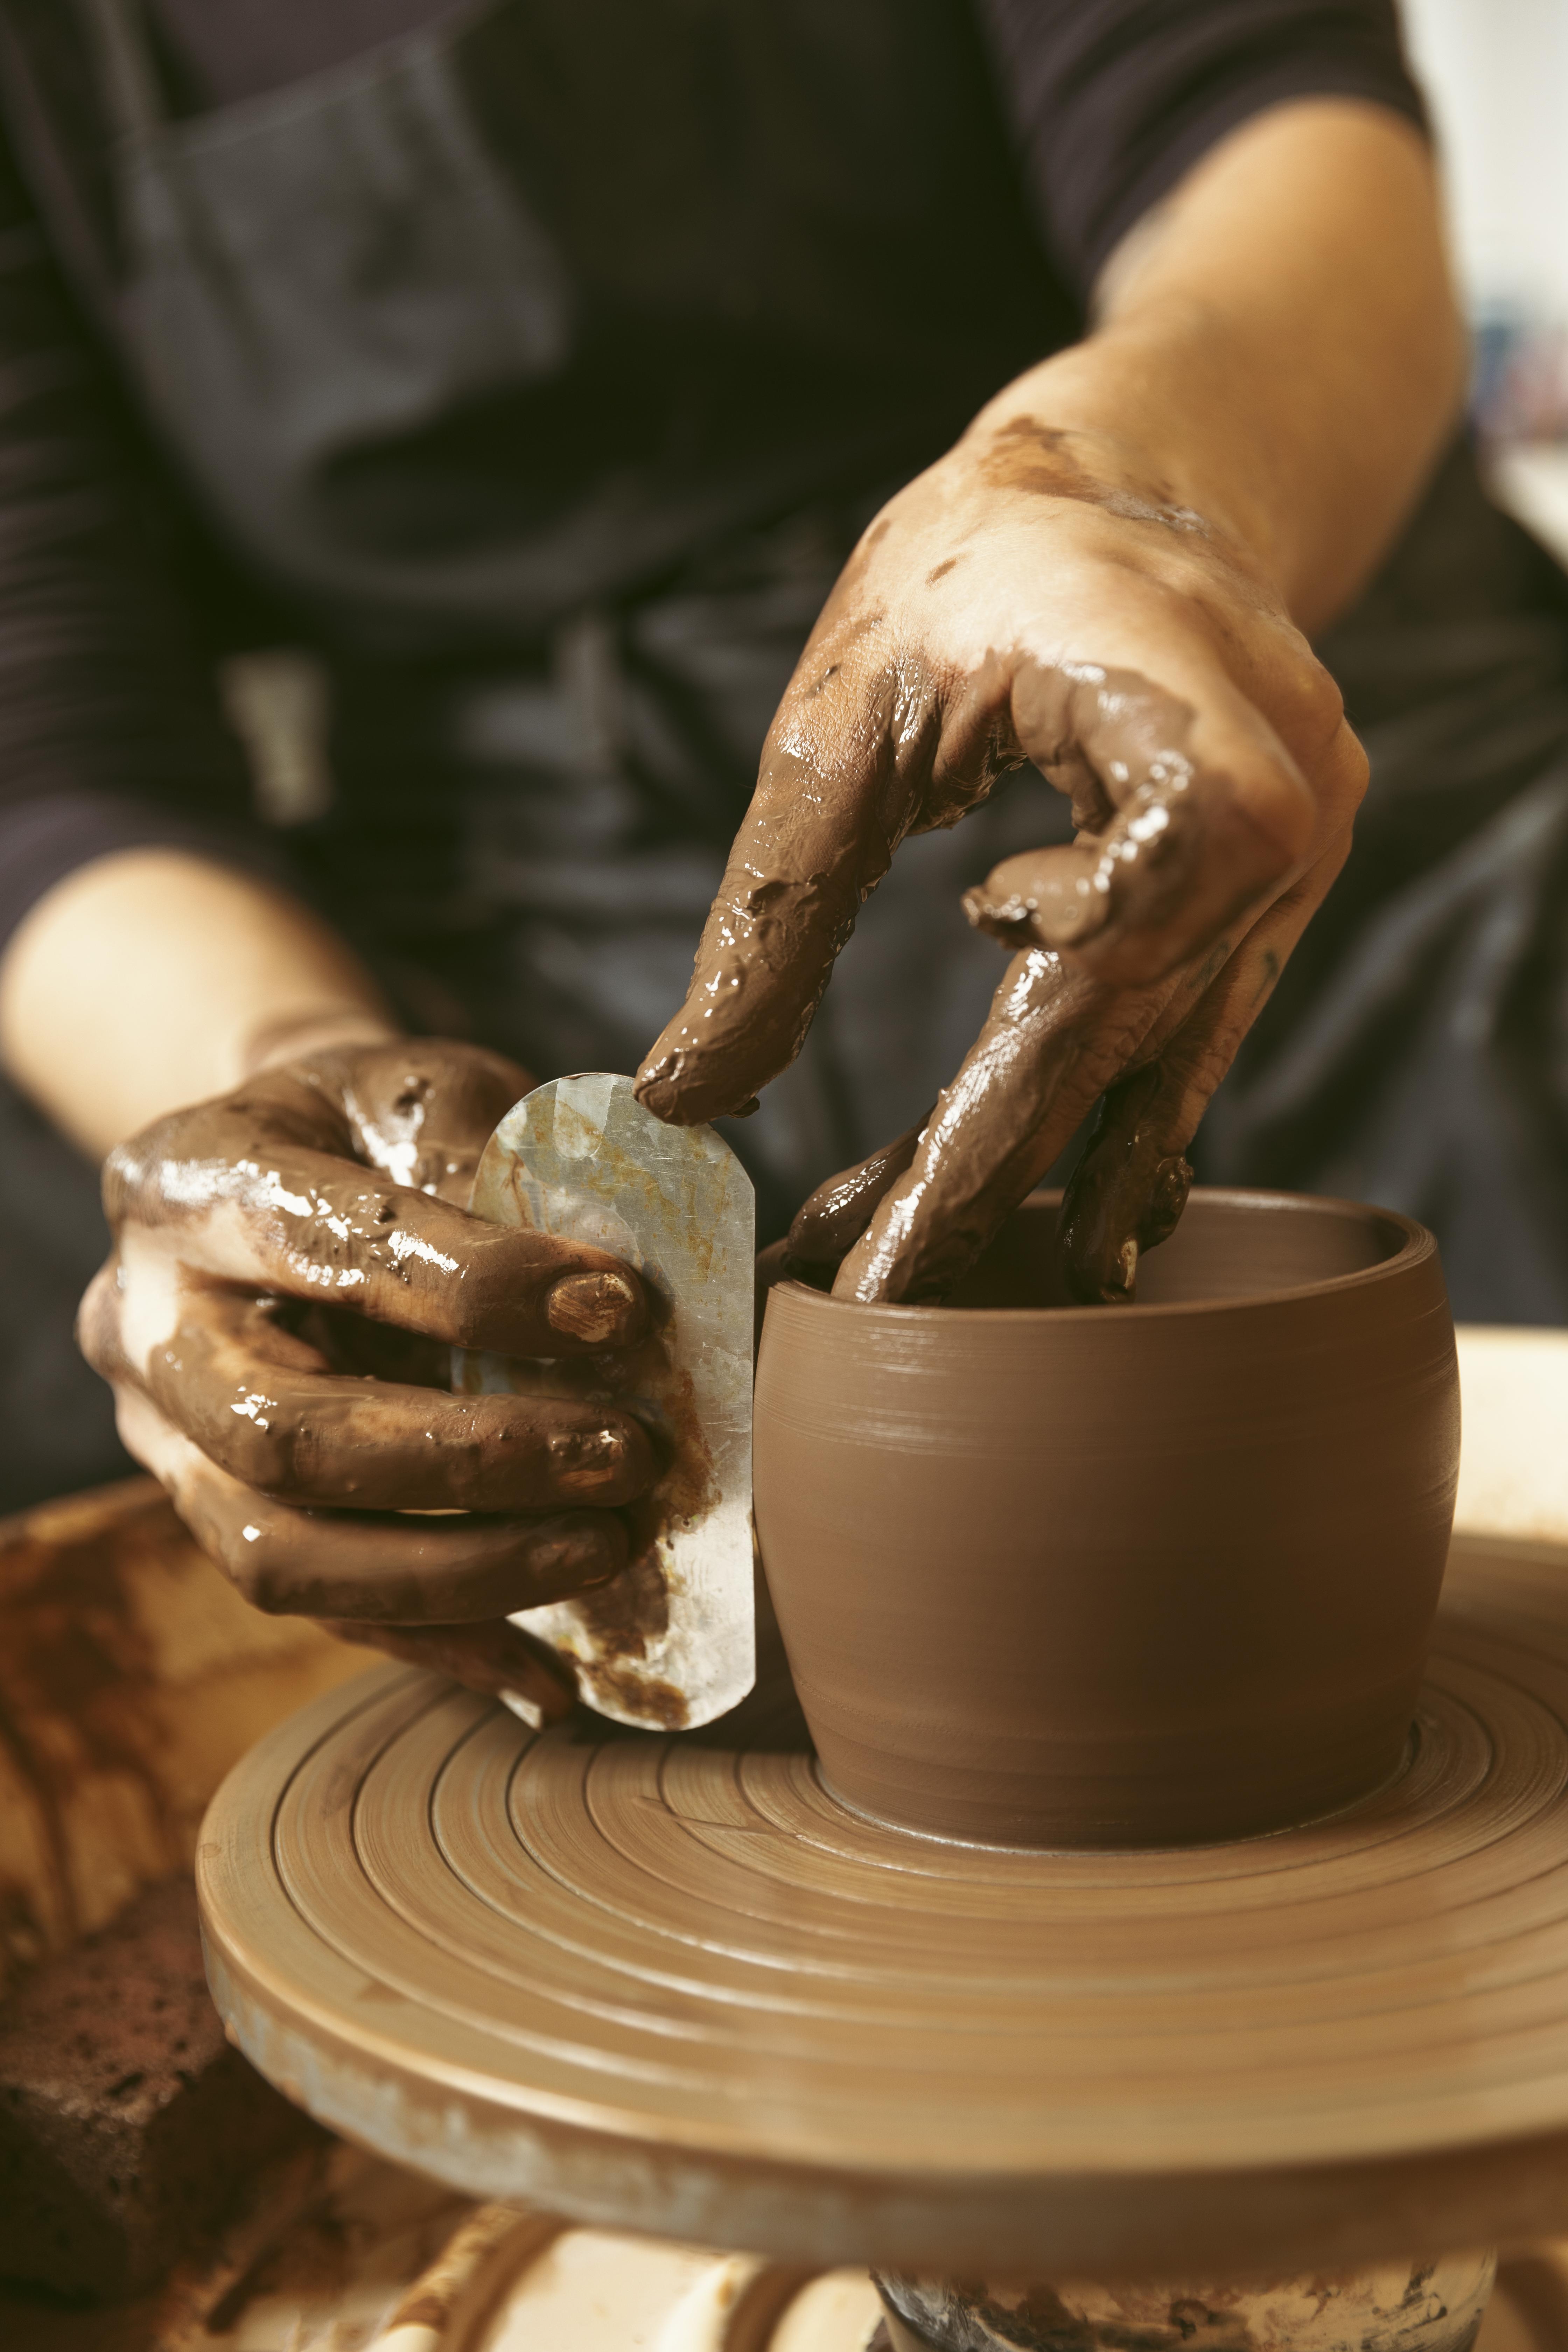
The final stages of wheel-throwing in pottery involve refining the form. Using various hand positions and tools, potters can create a wide range of shapes – cylinders, bowls, plates, vases, and more. Collaring in (narrowing the diameter) can create bottle forms, while flaring out creates wide rims.
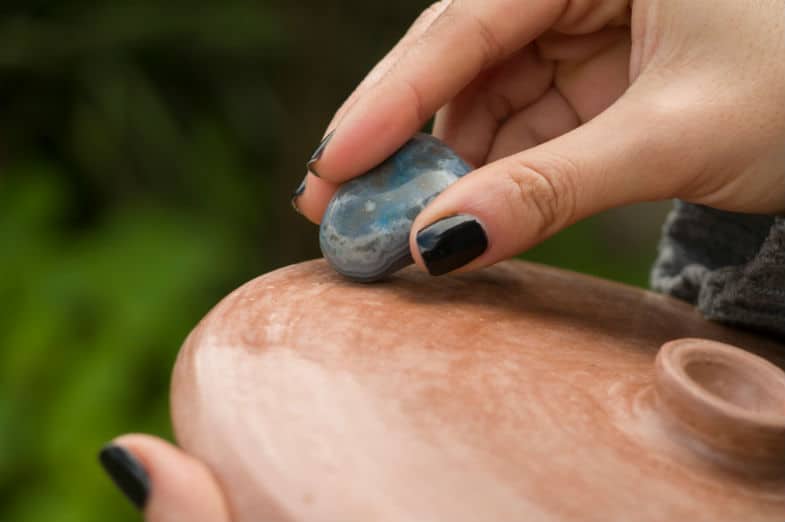
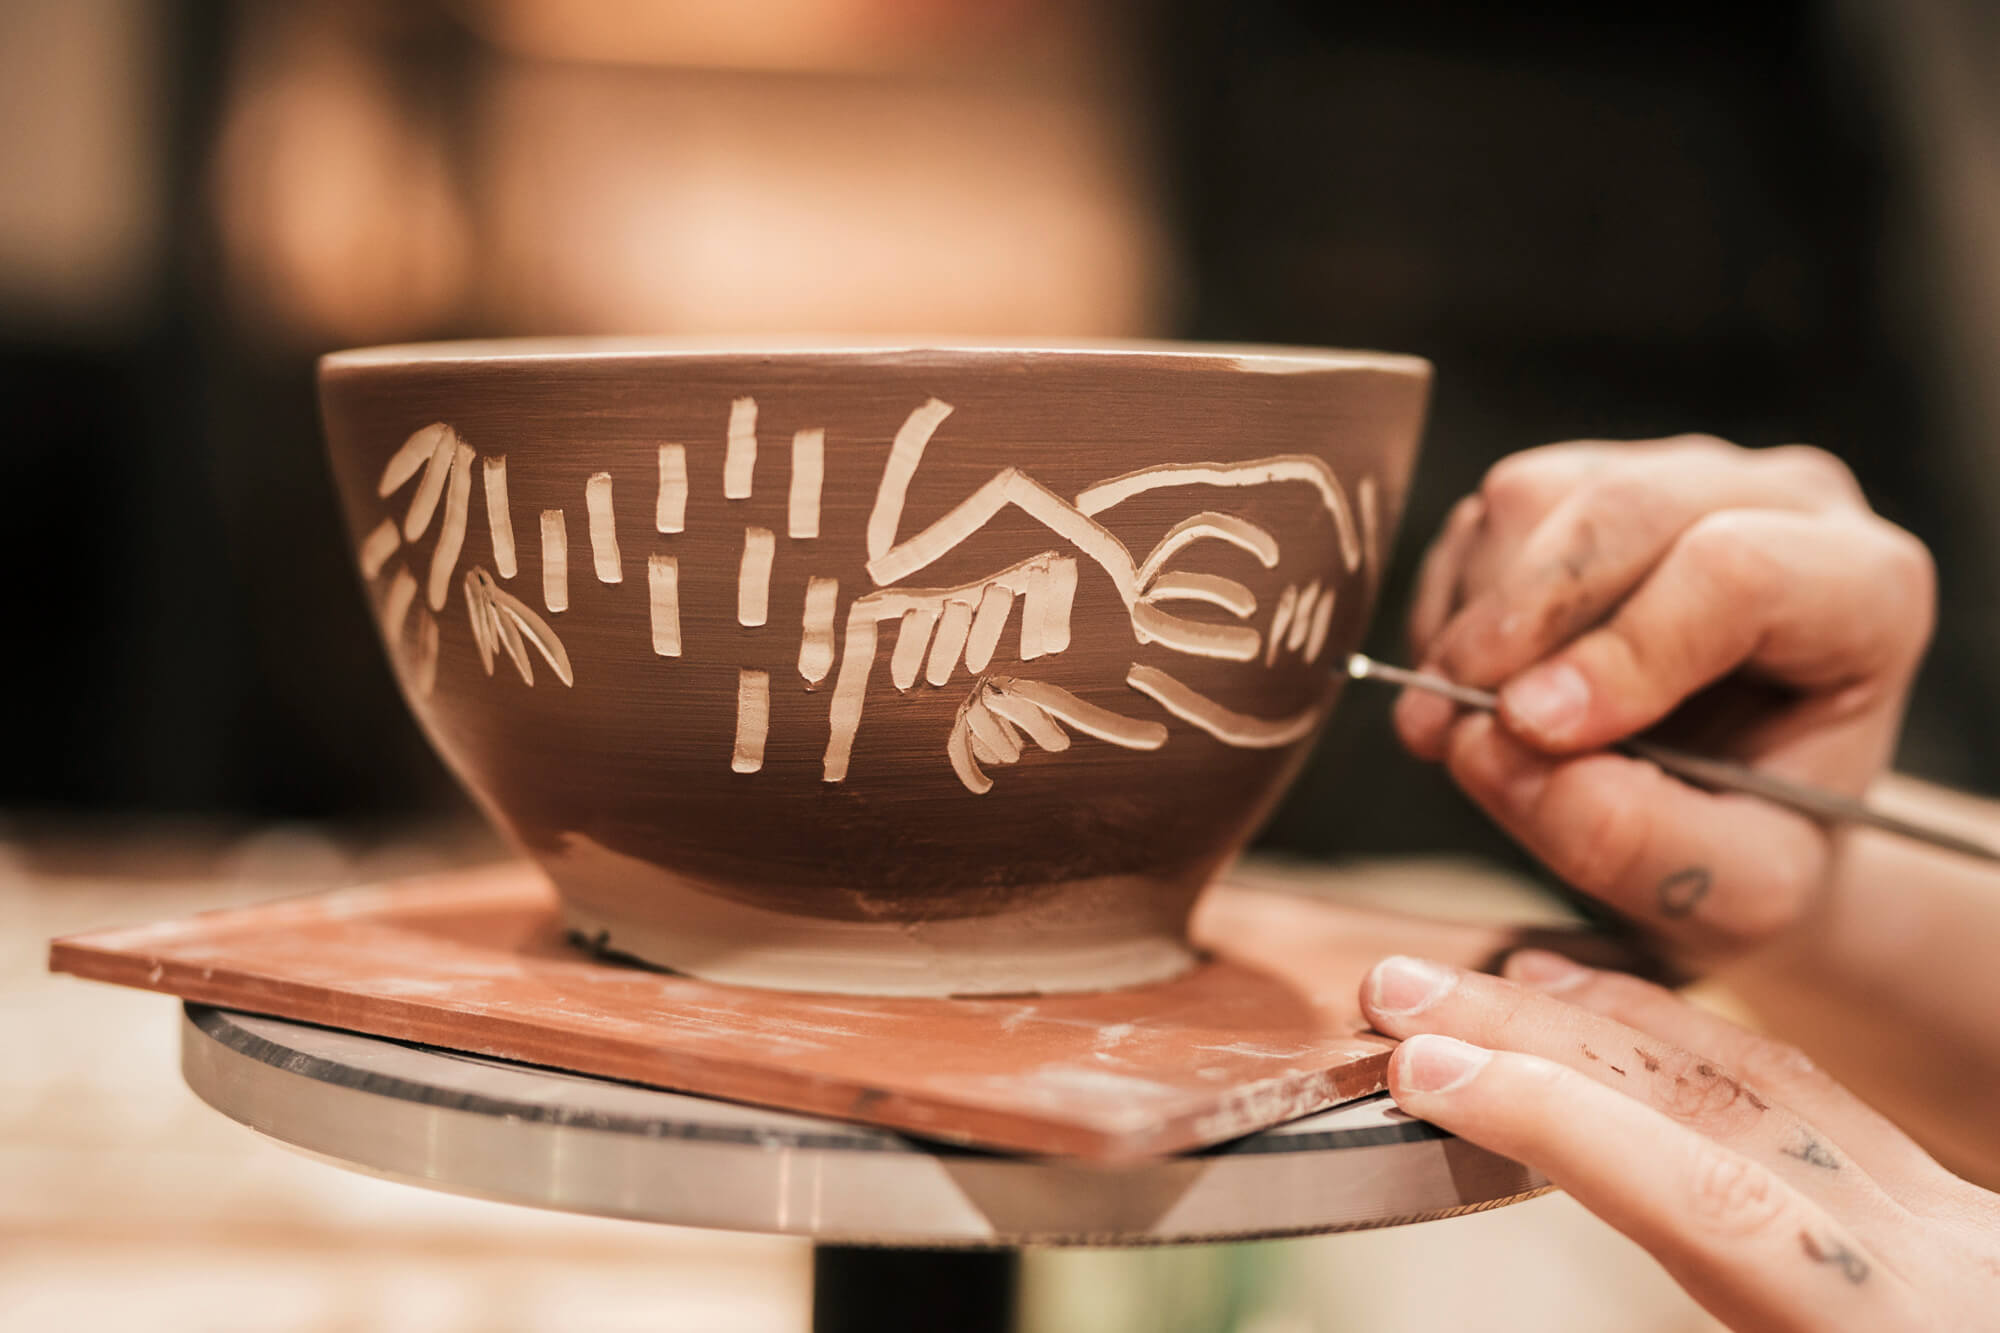
At this stage, surface treatments might be added while the clay is still on the wheel – textures can be impressed, patterns carved, or decorative elements attached. The piece is then cut from the wheelhead using a wire tool and left to dry to a "leather-hard" state before further finishing.
Essential Tools and Materials for Wheel-Throwing
Beyond the wheel itself, successful pottery wheel throwing requires specific tools and materials. While the craft can be started with minimal equipment, having the right tools enhances the experience significantly.
Not all clay is ideal for wheel-throwing pottery. The best clays for beginners have medium plasticity, good workability, and an appropriate firing range matched to the available kiln. Most beginners start with a mid-fire stoneware clay (Cone 5-6, approximately 2200°F). These clays are forgiving, widely available, and produce durable results. Porcelain, while beautiful, is more challenging for wheel throwing beginners due to its tendency to collapse and lower plasticity.
A basic wheel-throwing pottery toolkit includes a wire cutting tool for removing finished work from the wheel, wooden or rubber ribs for smoothing surfaces and shaping, a needle tool for trimming and creating details, sponges for adding/removing water during throwing, wooden trimming tools for refining the piece when leather-hard, and calipers for measuring diameters when making sets.
Common Techniques in Wheel-Throwing Pottery
As potters develop their skills, they explore various specialized wheel-throwing techniques to create different forms and effects. These methods build upon the fundamental skills while offering endless creative possibilities.
The versatility of wheel-throwing in pottery becomes apparent when exploring the variety of forms possible. Cylinders are the foundation of many wheel-thrown forms, including mugs, vases, and pitchers. Mastering the even-walled cylinder is often considered the first milestone in pottery wheel throwing.
Bowls require controlling outward pressure to create graceful curves. The challenge lies in maintaining even thickness as the form expands outward. Plates and platters involve throwing wider, flatter forms – a different challenge that requires managing clay across a broader surface area.
Beyond basic forms, advanced wheel-throwing pottery includes techniques like throwing off the hump (working with a large mass of clay and creating multiple smaller pieces without recentering each time), throwing in sections (creating larger pieces by throwing separate components and joining them), and altering thrown forms (manipulating the clay after throwing to create non-circular or asymmetrical shapes).
Wheel-Throwing vs. Hand-Building: Key Differences
When considering what is wheel-throwing in pottery relative to other forming methods, it's important to understand how it compares to hand-building techniques like pinching, coiling, and slab construction.
Wheel-throwing pottery excels at creating symmetrical, round forms efficiently. Once mastered, a skilled thrower can produce many similar items relatively quickly – a set of cups might take hours with hand-building but only an hour or less with wheel throwing.
Hand-building, by contrast, offers more flexibility for non-circular forms, sculptural elements, and textural variations. It also requires less specialized equipment, making it more accessible to beginners.
The learning curves differ significantly – hand-building techniques can produce satisfying results almost immediately, while wheel-throwing techniques typically require weeks of practice before creating successful forms.
Wheel-throwing in pottery is particularly advantageous when creating sets of matching pieces, making round, symmetrical forms, producing relatively thin-walled vessels, or working in a production setting where efficiency matters.
Common Challenges for Beginners in Wheel-Throwing
Learning what is wheel-throwing in pottery involves overcoming several common hurdles. Recognizing these challenges helps beginners persevere through the initial learning phase.
The most common challenge for beginners is achieving consistent centering. Without proper centering, everything that follows becomes more difficult. Centering issues often stem from inconsistent pressure application, improper body positioning, using inappropriate clay consistency, or working at the wrong wheel speed.
Wheel-throwing pottery requires maintaining proper clay moisture throughout the process. Too wet, and the clay becomes unmanageably soft; too dry, and it becomes inflexible and prone to cracking. Learning to recognize ideal clay consistency comes with experience, but beginners often err on the side of too much water. A common mantra in wheel throwing studios is "the less water, the better" – use just enough to prevent friction, not so much that it weakens the clay structure.
Uneven wall thickness is a persistent challenge in early wheel-throwing ceramics. Thicker bottoms and thinner rims occur when beginners don't compress the bottom adequately or apply uneven pressure during pulling. This skill develops gradually through conscious attention to the feel of the clay between your fingers.
Developing Your Skills: Progressing in Wheel-Throwing
Advancing in wheel-throwing pottery requires deliberate practice and strategic skill development. Rather than randomly experimenting, I recommend beginners focus on systematic practice: master centering consistently before moving on, practice creating cylinders of increasing height with even walls, learn to create basic bowls with smooth curves, and develop skill with one form before attempting variations.
This structured approach to wheel-throwing techniques creates a foundation of transferable skills. As basic skills develop, gradually introduce more challenging aspects of wheel-throwing in pottery: increase the weight of clay used, create taller forms that require greater control, attempt forms with multiple curves or components, and experiment with different clay bodies, including more challenging ones like porcelain.
Getting Started with Wheel-Throwing: Practical Advice
For those ready to explore what is wheel-throwing in pottery firsthand, here are practical steps to begin your journey.
While some potters are self-taught, most benefit from initial instruction. Options include community classes at local art centers or colleges, private lessons to accelerate learning, online courses to supplement hands-on learning, and books and tutorials for reference material.
Before investing in equipment for wheel-throwing pottery, consider space requirements (a wheel needs roughly a 5'x5' area minimum), mess management (clay dust and splatter require appropriate flooring), and firing options (without a kiln, you'll need arrangements for firing elsewhere).
Many beginners wisely begin with classes that provide equipment access before investing in their own studio. For home practice without a wheel, consider a clay-like modeling material that doesn't require firing, allowing you to practice hand positions and basic forms without the full investment.
Conclusion: The Enduring Appeal of Wheel-Throwing
Wheel-throwing in pottery represents one of humanity's oldest continuous crafts – a beautiful intersection of artistry, physics, and tactile pleasure that has captivated makers for millennia. From humble beginnings as utilitarian vessels to contemporary artistic expression, the fundamental process remains remarkably unchanged.
What draws most potters to wheel throwing is the unique combination of technical challenge and creative possibility. Few crafts offer such a direct connection between hand and material, where subtle variations in pressure and movement translate immediately into form. The centered lump of clay represents pure potential, ready to be guided into virtually unlimited expressions.
Whether you're drawn to wheel-throwing pottery for meditative practice, creative expression, or the satisfaction of making functional objects, understanding what is wheel-throwing in pottery is your first step on a potentially lifelong journey of discovery and creation.
Frequently Asked Questions About Wheel-Throwing in Pottery
How long does it take to learn wheel-throwing?
Basic proficiency in wheel-throwing pottery typically takes 4-6 weeks of regular practice (at least 2-3 sessions weekly). Most beginners can create simple cylinders and bowls within this timeframe. However, developing advanced skills for consistent, complex forms usually requires 1-2 years of dedicated practice.
Is wheel-throwing harder than hand-building?
Wheel-throwing in pottery generally has a steeper initial learning curve than hand-building. The coordination required for centering and forming on a moving wheel takes time to develop. However, once mastered, many find wheel-throwing more efficient for creating certain forms, especially round, symmetrical vessels.
What type of clay is best for beginners learning wheel-throwing?
Medium-soft stoneware clay with moderate grog (pre-fired clay particles) is ideal for beginners learning wheel-throwing techniques. This type of clay offers good plasticity, holds its shape well, and is forgiving of mistakes. Many beginners use a mid-fire stoneware (cone 5-6) as it's widely available and versatile.
Do I need my own pottery wheel to learn wheel-throwing?
No, you don't need to own a wheel initially. Most beginners start with classes at community studios, art centers, or schools where wheels are provided. This allows you to learn wheel-throwing pottery basics before investing in equipment. Many studios also offer open studio time for practice between classes.
What's the difference between electric and kick wheels for pottery?
Electric wheels use motors to rotate the wheelhead at adjustable speeds controlled by a foot pedal, making them easier for beginners to use. Kick wheels are manually powered by the potter's foot pushing a flywheel, offering more direct control but requiring more physical effort. Both can be used for all wheel-throwing techniques, though electric wheels dominate in modern studios.
Can left-handed people do wheel-throwing normally?
Yes, left-handed people can absolutely learn wheel-throwing in pottery. While traditional techniques developed for right-handed throwers, left-handed potters can either adapt these methods or reverse the wheel rotation (most electric wheels offer this option). Many left-handed potters become equally proficient, though some instructions may need minor adjustments.


Stay up-to-date